Showing posts with label DIY. Show all posts

Monday 21 May 2012

DIY: Shorts with embroidered ribbon

Este DIY lleva unas cuantas semanas hecho, pero por unas cosas y por otras me había sido imposible editar las fotos y preparar el post hasta ahora. Además, estamos teniendo unos días en los que las medias vuelven a aparecer irremediablemente cubriendo nuestras piernas, así que no he podido tampoco hacerme fotos con ellos puestos (con medias no quedan nada bien). Eso sí, cuando el tiempo lo permita, ya os los traeré en algún look. La verdad es que es un DIY muy sencillo y muy resultón. ¿Os animáis a haceros unos? Bueno, vamos con las instrucciones que como veréis son muy simples.

I've been wanting to show you this DIY for weeks but it has been impossible for me until today. I've been so busy! I haven't got pictures with them on, the weather isn't helping these days and tights are again covering our legs. They aren't made to wear with tights, they are very summery. Don't you think? Well, I'll show you them on a look when sun comes again. Do you fancy doing your own ones?

En caso de usar unos pantalones largos, cortarlos a la medida que más os guste. Luego, hacer un corte triangular en cada uno de los costados en el lugar donde luego colocaremos la cinta bordada. 
In case you use long trousers, cut them the length you prefer. Then, make a triangular cut at both legs in the place where the embroidered ribbon will be placed.


Ajustar la cinta con alfileres por el reverso del pantalón y coser con puntadas pequeñas, para que no se vean. Y esto es todo. ¿Os ha gustado? Aquí tenéis un look con ellos.

Adjust the ribbon with pins at the shorts reverse. Sew using small stitches so they won't be visible. And that's all! Do you like it? Here you have a look with them.


Image Hosted by ImageShack.us


Thursday 29 March 2012

Black and rust

Con los estupendísimos días que estamos teniendo últimamente, la chaqueta nos va sobrando. Salgo de casa con ella por la mañana, pero a la vuelta la llevo colgada del brazo, porque se está de maravilla bajo el sol. Éste es uno de esos looks que no necesitan mucho quebradero de cabeza. Una camisa con un estampado especial es la protagonista del look, junto con este collar DIY (tenéis el tutorial aquí) al que le estoy sacando bastante partido. Es uno de esos looks para esos días en los que me apetece algo un poquillo más rockero, más cañero.

We're living sunny and warm days here in Barcelona and jackets are starting to be unneccesary.This is the kind of look that does not need a lot of thinking. Ideal for these days when you don't really know what to wear but to be comfortable and show your rocker side. Just a simple shirt with a special print and a DIY necklace (tutorial here) as the main characters of the outfit.  
  
Image Hosted by ImageShack.us

Camisa/Shirt: Pull and Bear (aw11-12)
Jeans: Mango (old)
Cazadora/Jacket: Mango (old)
Botines/Boots;: Zara (old)
Collar/Necklace: DIY (tutorial here)
Pulseras/Bracelets: H&M and EmerJa Skulls(collar a modo de pulsera/necklace as bracelet)

Thursday 15 March 2012

I painted my blouse and I'm in love with it!

Como ya sabéis, me encantan los DIY. No sólo permiten poder imitar prendas de grande diseñadores que no nos podamos permitir, sino que también podemos crear prendas únicas, que sólo vayamos a llevar nosotras. La verdad es que me encanta pensar nuevos diseños que hacer, y tengo muchísimas ideas en la cabeza. El único problema la mayoría de las veces es el tiempo, que es un recurso escaso y que a veces impide el poder hacer todo lo que me gustaría hacer. Pero bueno, este fin de semana saqué un huequecito y me puse a pintarme una blusa muy sencilla, pero que me encanta por el vuelo que tiene. Esta vez, no he hecho ningún tutorial DIY, pero simplemente la pinté con pintura acrílica e iba dando pinceladas aquí y allá como a mí me gustaba. El resultado quedó incluso mejor de lo que yo tenía en mente. Tanto que, como veis, no he podido resistirme a estrenarla ya, viendo que estos días ha hecho un sol estupendo por las mañanas.  Me la voy a poner muchísimo esta temporada.  Ya os la iré enseñando en más looks. ¿ Qué os parece?

As you know I'm a big fan of DIY and I like doing my own ones. They don't only permit the imitation of great designers' garments, they also permit us to create designs anybody else will wear, because they are unique. This second part is the one I like the most. Normally, the only problem is time. Time is needed to do this kind of projects and it is always limited. But, last weekend I had some of this precious time and I decided to paint a blouse. I hope you like it. 

Image Hosted by ImageShack.us


Blusa/Blouse: DIY
Jeans: Zara (old)
Botines/Booties: Hakei (sales)
Cazadora/Jacket: Mango (old)

Monday 5 March 2012

DIY: Tribal Pastel T-shirt

Cómo ya os comenté hace una semanas, tenía pensado un DIY donde plasmar una de las tendencias que más vamos a ver esta temporada: los colores pastel. Las tiendas están saturadas de estos colores, y ya hemos visto infinidad de street style luciendo esta tendencia "pastelmaníaca", llamando a la primavera. Éste DIY, además de tener los tonos pastel como protagonistas, tiene otra de las tendencias que llevamos viendo ya varias temporadas y que parece que aún van a quedarse un poco más, eso sí, con aires renovados: el estampado tribal. Yo he querido introducir ambos elementos de forma sutil en un DIY fácil y resultón. Eso sí, requiere paciencia. No me enrollo más y vamos a empezar con el tutorial.

As I told you weeks ago, I was thinking of making a DIY with pastel colours as the main characters. We are seeing this trend everywhere: shops are full of them and we've also seen a lot of street style in pastels. However, this DIY not only reflects this trend, I've wanted to make my own version of tribal print. Both elements are introduced in an easy and attractive DIY. So, let's start with the tutorial.

Image Hosted by ImageShack.us
Primero hay que hacer la plantilla que nos servirá para plasmar el dibujo sobre la camiseta. Yo he escogido estas formas con cierto aire tribal, pero se puede hacer lo mismo con cualquier otro dibujo. Una vez dibujado hay que vaciarlo con el cutter.

Firstly, create the template that will be used to draw the pattern on the t-shirt. I've chosen this tribal shapes, but you can do the design you prefer. Once it is done, cut out the template with the cutter.
Image Hosted by ImageShack.us
Después, colocar la plantilla sobre la camiseta en el lugar que queráis y asegurarla con cinta adhesiva. Con el lápiz traspasar el dibujo a la tela.

Then, place the template on the t-shirt where you prefer and secure it with some tape. With a pencil draw the pattern on the t-shirt.
Image Hosted by ImageShack.us
Retirar la plantilla y pintar con la pintura acrílica el dibujo. Esta pintura puede mezclarse para obtener el color que queramos. Una vez pintado, dejar secar y planchar directamente sobre la pintura, para que ésta se fije bien a la tela.

Remove the template and colour the pattern with the acrylic paint. This kind of paint can be mixed easily, so you can make the colour you want. Once it is painted and dry, to adhere the paint to the fabric, iron it.  
Image Hosted by ImageShack.us
¿Os ha gustado? Ya me contaréis si os atrevéis a haceros la vuestra. La verdad es que esta técnica tiene muchas posibilidades, yo ya estoy pensando en un nuevo diseño. ¡Que tengáis muy buena semana!

Do you like it? Tell me if you dare to do yours. This technique has a lot of possibilities. I'm just thinking of a new design :) ¡Have a nice weekend! 

Thursday 19 January 2012

Vintage in Burgundy

Esta vez al fotógrafo le apetecía probar cositas nuevas con el photoshop, y yo encantada. Me encanta el color vintage que han cogido las fotos. ¿Qué os parece?
Además, hoy os cuento, para las que aún no os hayáis dado cuenta, que EmerJa ya tiene dominio propio. www.emerjadesign.com Ha sido uno de los regalos de cumple (que fue la semana pasada) de Borja, mi chico y fotógrafo del blog, además del bolso que os enseño en el look de hoy y un e-book Kindle (¡con lo que me encanta leer!).  ¡¡Anda que no me hizo ilusión!! Y este nuevo dominio es sólo el principio, porque poquito a poco me gustaría cambiar algunas cosas del diseño del blog, entre ellas la barra lateral y la cabecera. Pero eso será cuando acabe exámenes y demás y tenga tiempo para ponerme a pensar y diseñar cómo me gustaría que fuese.

This time the photographer wanted to play a little with photoshop, and I'm delighted. I love the vintage colour of the pictures. What do you think?
Furthermore, I want to tell you, if you haven't noticed yet, EmerJa has a new URL: www.emerjadesign.com It has been one of the present my boyfriend (and photographer of the blog)gave to me for my birthday (it was last week). I was sooo happy when I knew it. And this is just the beginning of some changes on the blog. I would like to change the desing, starting with the header and the side bar. But this won't be until I finish all my exams and stuff. 


Image Hosted by ImageShack.us

Chaqueta/Jacket: Zara (old)
Camisa/Shirt: Zara (old)
Pantalones/Trousers: Stradivarius
Collar/Necklace: DIY (tutorial here)
Bolso/Bag: Adolfo Dominguez
Botas/Boots: Sendra
Boina/Beanie: H&M (old)
Mitones/Fingerless gloves: H&M (old)

Thursday 3 November 2011

DIY: XL Necklace

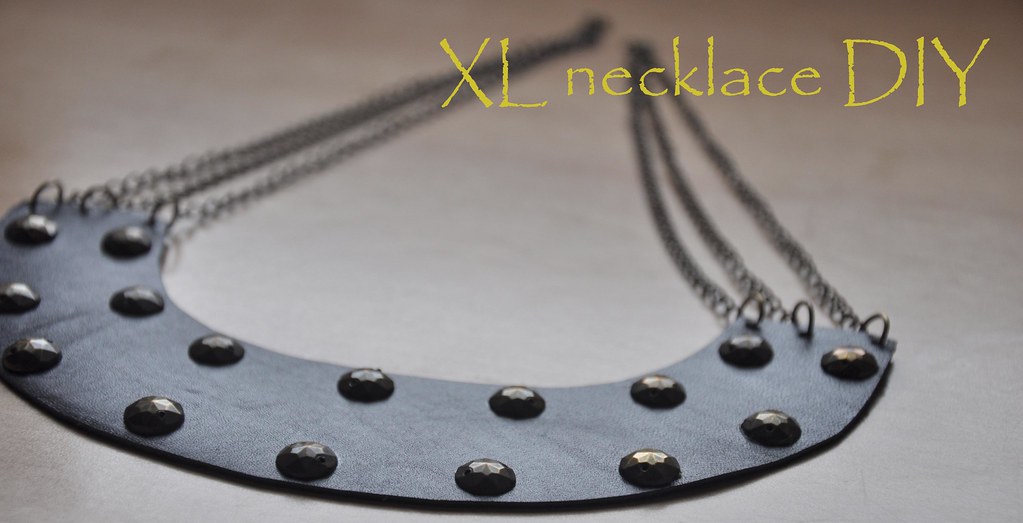
El otro día viniendo de la Universidad se puso a llover a cántaros y yo lo llevaba paraguas, por lo que llegué a casa empapadísima. Ahora, llevo unos días en un hiper resfriado, por lo que he estado recluida en casa y a base de antibióticos y leche calentita con miel. Yo que soy un culo inquieto, no he podido estar de brazos cruzados, así que he aprovechado para hacer un nuevo DIY. Esta vez un collar XL de cuero con tachuelas. Os traigo el tutorial y espero que os guste mucho. A ver si prontito puedo estrenarlo y os traigo las fotos del look. La verdad es que el resultado me encanta, y os aseguro que puesto gana mucho más.

Last Thursday when I was arriving home from the University it started pouring and I hadn't got an umbrella. I arrived home totally wet, and I caught a super cold.  I've been last days resyting and home, with meds and hot milk cups with honey. It's very difficult to stay at home without doing anything all these time, so I've done a DIY. This time it is a XL necklace made of leather and studs. I hope you like it. As soon as possible I'll try to show you how to wear it, I swear it looks much better when you try it on.:)

DIY DIY
Image Hosted by ImageShack.us
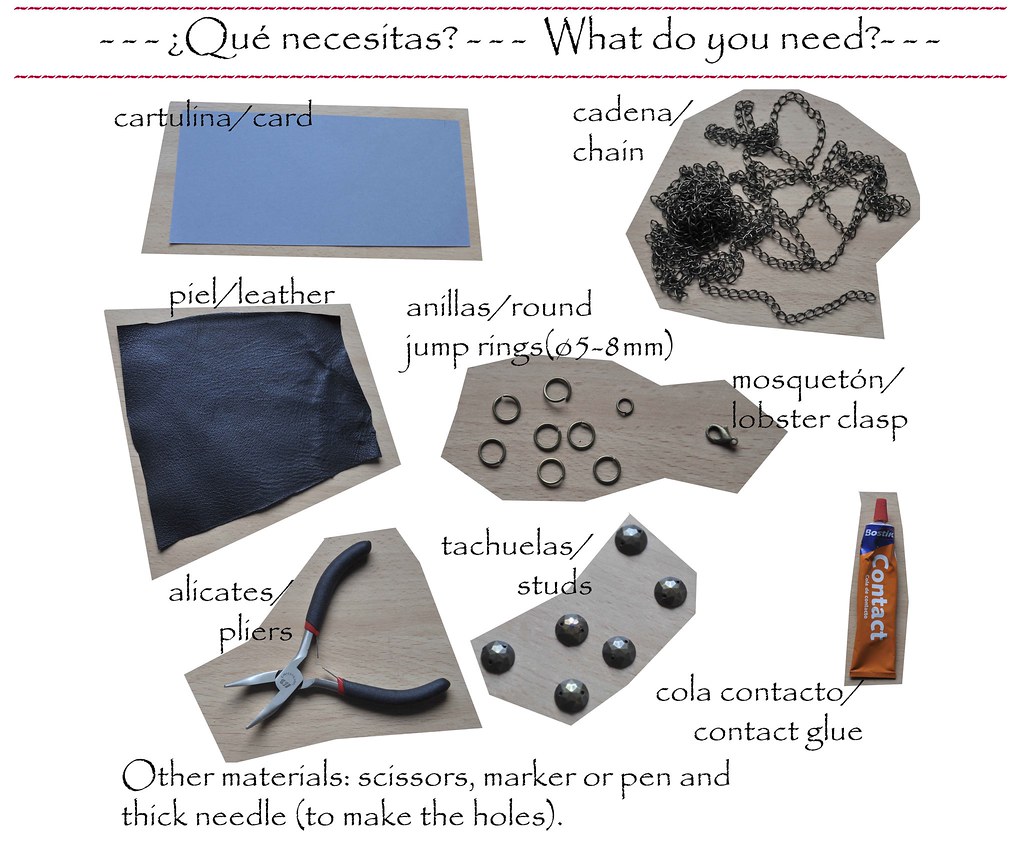
Doblar por la mitad un trozo de cartulina. Dibujar la mitad de la forma deseada (como se ve en la imagen). Cortar la forma y desdoblar la cartulina. Tenemos la plantilla.

Fold a piece of card. Draw half the shape you want (as you can see on the picture). Cut the shape and unfold the card. You've got the template. 

Image Hosted by ImageShack.us

Poner la plantilla encima da piel (mejor por el reverso), dibujar la forma con un lápiz sobre ella y cortar.

Put the template on the piece of leather(better at the back side of the leather, the reverse), draw the shape with a pen on it and cut.

Image Hosted by ImageShack.us

Realizar 3 agujeros en cada uno de los extremos, tal y como se ve en la figura. Yo los he hecho con una aguja ardiendo. No tengo fotos, pero es muy simple. Usad la aguja más gorda que tengáis, ponedla en el fuego y cuando esté roja entonces podéis usarla para hacer el agujero. Una vez hechos los 6 agujeros, colocar las anillas grandes (8mm). De cada anilla ha de salir una cadena de unos 16 cm.

Make three holes in each end, as seen on the picture. I've done them with a burning needle. I haven't got pictures, sorry, but it is really easy. Use the thickest needle you have and put it on the fire, when it's red, then you can use it to do the hole. Once the holes are done, put a round jum ring (8mm) in each, and a 16 cm lenght chain from each ring.

Image Hosted by ImageShack.us
Unir las cadenas, tres un un lado y tres en el otro. En un lado usar una anilla de 8mm y en el otro lado una anilla pequeña (5mm) y el mosquetón.  

Join the chains 3 and 3 together, one group with anothe 8 mm ring, and the other with a 5mm ring and a lobster clasp

Image Hosted by ImageShack.us
Ahora sólo hay que colocar las tachuelas en el lugar que se desee y pegarlas con la cola de contacto. 

Now, you just have to place the studs in the place you want and stick them with contact glue. 

Image Hosted by ImageShack.us

¿Os ha gustado? Es un poco más complicado que el cuello glitter, pero tampoco mucho más. Lo más entretenido en la parte de las cadenitas, pero es tener un poco de paciencia porque el resultado es bueno. Ya me contaréis si os habéis animado a hacerlo. Yo estoy pensado en hacerme otro similar, pero con cuentas y piedras de colores, un poquito más recargado:)

¿Do yoy like it? It's a little bit more complicated than the glitter collar, but not much more. The most "difficult" part may be putting all the chains, but it is just patience. If you try to do yours, tell me :) I'm thinking of doing another one, but this time with different kind of beads, with more ornaments.

Además, aprovecho para dar las gracias a Sandra y Emma de EstaNocheSoyUnaPrincesa quienes me hicieron una entrevista muy personal sobre mis diseños y que hoy mismo han publicado. Me ha encantado el resultado y espero que os guste también a vosotr@s. Aquí la tenéis. GRACIAS CHICAS!:)


Thursday 27 October 2011

DIY: Glitter collar

Ya que muchas de vosotras me pedisteis que hiciese el tutorial de como haceros el cuello glitter de quita y pon que os enseñé en este post. ¡Aquí lo tenéis!

Some of you asked me to do a tutorial about how to make the glitter collar I showed you in this post so, here you have it! 


MATERIALES:                                                       
- Fieltro  (yo lo he cogido en gris)
- Cola blanca
- Pincel viejo (la cola los suele estropear)
- Purpurina

MATERIALS:
- Felt (I've choosen one in grey)
- Wood glue
- Old paint brush (better this way, because glue ruins brushes)
- Gold and silver glitter

Dibujar la forma deseada en una de papel doblada por la mitad, de tal modo que al recortar ambos lados sean simétricos. Colocar el papel sobre el fieltro y asegurar con alfileres.

Draw the shape on a folded sheet of paper, when cutting it both sides will be symmetrical. Join the felt and the paper with pins. 

Image Hosted by ImageShack.us
Mezclar un poco de cola blanca con la purpurina. Extender la mezcla con ayuda del pincel sobre el fieltro. Esperar algunas horas hasta que esté completamente seco. 

Mix some wood glue and the glitter together. Spread the mixture over the felt using the brush. Then, wait some hours until it is completely dry.

Image Hosted by ImageShack.us

Para atarlo al cuello, simplemente podéis coserle una cinta en los extremos, y ponerle un corchete. Cómo podéis ver, no tiene ninguna complicación, así que si os animáis estaré encantadísima de ver los resultados :)

To tie it around your neck, just sew a ribbon in each end or a hook and an eye. As you can see it is very easy to do, so if you finally do it, I would like to see the result. 


Thursday 20 October 2011

Good Feeling

Creo que este podría ser mi último look veraniego. El otoño ya está aquí (hurra!) y los fulares y mangas largas son indispensables ahora en mi día a día.
Esta semana os he enseñados dos looks muy distintos, pero ambos con cuellos DIY de quita y pon como pieza importante del conjunto. Si el otro día os enseñaba uno el piel y con tachuelas, hoy le toca el turno a uno glitter, lleno de purpurina. ¿A que es bonito? 

I think this could be my last summery look. Autumn is already here (hurray!) and foulards and long sleeves are indispensable in my everyday life now. 
This week I've showed you two very different looks but both with DIY collars as the essencial part of the outfit. On Monday the collar was made of leather and studs and today there's a glittery one. Don't you think it is so nice?

Image Hosted by ImageShack.us
Camiseta/T-shirt: Pull&Bear
Cuello/collar: DIY
Falda/Skirt: Pull&Bear (old)
Botines/Ankle boots: Zara (old)
Clutch: Blanco (old)

Me he apuntado al concurso Mustang en Chicisimo con un look que os enseñé en verano, me encantaría recibir vuestros votos, os dejo el link aquí. Muchas muchas gracias:)

Monday 17 October 2011

Black leather skirt

El frío poco a poco va asomándose, pero no acaba de quedarse. Yo aún me resisto a las medias y es que aunque ya tenga ganas de ellas, con el buen tiempo que hace no me convencen aún. Y yo a lucir mis piernas blanquitas, tienen ese color paliducho sea verano o invierno, así que ya me he acostumbrado a ellas y no es cuestión de ir tapándolas ahora. Con lo que me gusta a mí ir con faldas! Ésta va a ser una de mis preferidas para este invierno, ya me la imagino con jerseys gorditos :) El cuello de piel es un DIY, hecho con la piel de la caña de unas botas viejas y con unas tachuelas que le he pegado. Me encanta! Adorna cualquier camiseta simple y tiene ese puntillo de niña buena. 

Here it's still hot to wear tights, so I go with my bare pale legs. They are this colour summer and winter, so, once you get used to that, you don't mind to show them. I love wearing skirts and this is going to be one of my favourites, I'm already imagining it with jumpers. The collar is a DIY. I did it with the leather of an old pair of boots and sticking some studs. I love it! It transforms a simple t-shirt in a cool one, and it has de good-girl touch. 

Image Hosted by ImageShack.us
Camiseta/T-shirt: Zara 
Cuello/Collar: DIY
Falda/Skirt: H&M
Cinturón/Belt: Blanco (old)
Calcetines/Socks: Grupo EME SOCKS
Botines/Booties: Mango

Image Hosted by ImageShack.us

El otro día me llegó a casa un paquetito de Grupo EME: unos cuantos calcetines preciosos. En su tienda on-line podéis encontrar un montón de modelos. Mis preferidos, y que tengo ya ganas de estrenar, unos de lunares preciosos. Además, todos son súper suaves! Ya os iré enseñando el resto en próximos looks:)